Battle of Belmont (1899)
"I detest war," Lord Methuen wrote to his wife the evening after Belmont. Outside his tent, a soldier lay groaning with a bullet through his chest. Then silence. "Perhaps God has released him." It was 23 November 1899, barely three weeks into the Second Boer War, and the British Empire was learning a lesson it would relearn at terrible cost across the South African veld: that courage without intelligence is just a faster way to die.
The Road to Kimberley
The plan looked simple on paper. Lieutenant General Lord Methuen would march his 1st Division north along the Western Railway from the Orange River to relieve the besieged diamond city of Kimberley. General Buller, commanding the 40,000-strong Army Corps dispatched to South Africa, had ordered the civilians evacuated by rail. Methuen would follow the tracks, staying close to his supply line in a waterless region where pack animals were scarce. There was no attempt at secrecy. The British expected little resistance and made no effort to deceive the Boers about their direction of march. But Methuen was blind. A shortage of cavalry meant almost no effective reconnaissance, and the Boers knew his exact strength and composition while he knew almost nothing of theirs. About 2,000 Boer fighters had dug in along the range of kopjes near Belmont station, 19 miles from the starting point, to delay the British advance.
Darkness and Faulty Maps
Methuen's plan called for a night march to outflank the Boer positions at daybreak. The Guards Brigade would sweep southeast while the 9th Brigade pushed east to storm Table Mountain. At 2:55 AM on 23 November, the columns stepped off into the dark. The trouble began with the maps. British intelligence described Gun Hill as a single conical peak. In reality, it was a saddle-shaped ridge with two summits, and a separate hill lay to its south that no one had charted. Poor reconnaissance and the confusion of a night march deposited the Guards not on the flanks of the kopjes but directly in front of them, exposed on open ground. The 9th Brigade found itself in the same position before Table Mountain. Instead of the planned flanking maneuver, the British faced costly frontal assaults up rock-strewn slopes against entrenched riflemen who could see them coming.
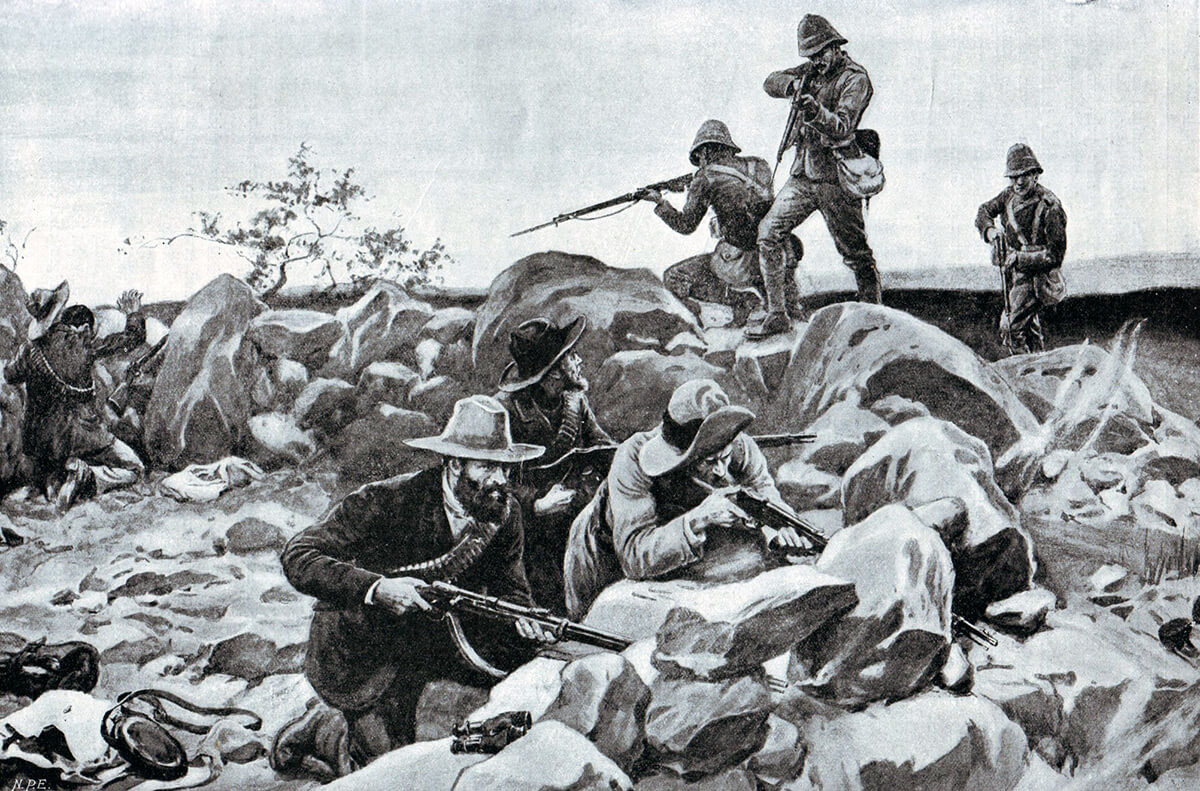
Bayonets at Dawn
At 3:55 AM the Grenadier Guards charged Gun Hill and the unnamed rise they would later call Grenadier Hill. It was hand-to-hand fighting in the dark, the kind of desperate close-quarters combat that no amount of imperial confidence can prettify. Most of the Boer defenders retreated on their ponies once the bayonets came out. Lieutenant Colonel W. P. Pulteney of the Scots Guards captured about thirty of those ponies, mounted his officers on them, and rode them into an improvised cavalry charge against the south side of Table Mountain. Meanwhile, the Coldstream Guards advanced toward Mont Blanc only to come under heavy fire from Sugarloaf and Razorback, hills that simply did not appear on British maps. Colonel Codrington swung his battalion right to engage them, supported by the 4.7-inch naval gun the sailors had nicknamed "Joe Chamberlain." By 6 AM, Methuen had rewritten his entire battle plan on the fly, redirecting the Guards to assault Mont Blanc from the south while the 9th Brigade pinned the defenders from the east.
The Cost of Blindness
The British took Belmont. They carried every kopje by frontal assault, bayonet charge, and sheer determination, suffering about 200 casualties in the process. The Boers melted away on their ponies, reformed at Graspan a few miles to the north, and entrenched again. When the British attacked there too, the pattern repeated almost exactly, with another 197 casualties. One sailor captured the absurdity of it: "At 200 yards we fixed bayonets, and we just saw their heels; they didn't wait when they heard the rattle." The British won every hilltop but could not catch the mobile enemy who chose when and where to fight. As historians of the period have consistently noted, the root cause of the heavy losses was a lack of mobility and poor intelligence, with virtually no detailed cartography at the scale needed for tactical planning. Belmont was the opening act of Methuen's march to Kimberley, a march that would reach its catastrophic climax weeks later at Magersfontein, where the same failures of reconnaissance would exact a far heavier toll.
Ghosts on the Veld
Today the kopjes near Belmont stand quiet on the Northern Cape veld, their rocky outlines unchanged since the Grenadier Guards scrambled up them in the dark. The railway still runs through, as it did when Methuen's supply trains followed his bleeding column northward. From the air, the terrain tells the story the maps could not: the long, low ridgelines that offered the Boers perfect fields of fire, the open ground that gave the British no cover, the distances between kopjes that made coordination nearly impossible in darkness. Belmont is not one of the war's famous names. It lacks the mythic weight of Spion Kop or Magersfontein. But for the soldiers who fought it, the battle carried a lesson that wars keep teaching: that the ground itself is the first enemy, and the side that knows it best holds the advantage no amount of bravery can overcome.
From the Air
Coordinates: 29.42°S, 24.37°E. The battlefield lies along the railway line in the flat Northern Cape veld, near the small town of Belmont in the Siyancuma Local Municipality. From 5,000 feet AGL, the kopje ridgelines are visible running parallel to the tracks. Nearest airport: Kimberley (FAKM), approximately 50 nm to the north. The terrain is semi-arid scrubland with excellent visibility in clear weather.