Battle of Neville's Cross
Philip VI of France was desperate. In the summer of 1346, an English army under Edward III had landed in Normandy and was carving through his kingdom. Philip needed a diversion, and he knew exactly who to call. "I beg you, I implore you," he wrote to Scotland's King David II. "Do for me what I would willingly do for you in such a crisis." Philip promised that northern England was "a defenceless void." David believed him. It was a catastrophic miscalculation.
The Auld Alliance Calls
The bond between Scotland and France, known as the Auld Alliance, had been renewed in 1326 with a simple purpose: if England attacked either nation, the other would invade English territory. By October 1346, Edward III had committed troops to Normandy, Gascony, Brittany, and Flanders. On paper, northern England looked exposed. David II assembled approximately 12,000 men at Perth, many equipped with modern French weapons and armor. A contingent of French knights marched alongside the Scots. Contemporary chroniclers on both sides described it as the strongest and best-equipped Scottish expedition in years. The army crossed the border on 7 October, stormed the fort at Liddell Peel and massacred its garrison, bypassed Carlisle in exchange for protection money, sacked Hexham Abbey, and arrived outside Durham on 16 October. What David did not know was that Edward III had exempted the counties north of the River Humber from his French mobilization. The north was not defenceless at all.
Within Sight of the Cathedral
An English force of 6,000 to 7,000 men had assembled at Richmond under the Archbishop of York and rapidly marched to intercept. On the misty morning of 17 October, a Scottish raiding party of 500 men stumbled into the English army near Merrington, losing 300 men before racing back to alert David. The Scottish king drew up his forces on high ground less than half a mile west of Durham, within sight of the great cathedral. Both armies arranged themselves in three divisions. Both initially adopted defensive stances and stared at each other through the morning, neither willing to attack. The stalemate broke in the afternoon when English longbowmen advanced to harass the Scottish lines. On the English left, arrow fire drove off the Scottish light cavalry and archers, exposing the flank of the Earl of Moray's division. When a cavalry charge to clear the bowmen failed, the Scots were provoked into attacking across broken ground cut by ditches and walls.
A King Under a Bridge
The advance shattered Scottish formation. Moray's division was cut apart. Seeing this, the largest Scottish division under the Earl of March broke and fled without closing with the enemy. David II's own division fought on in what chroniclers described as "ferocious" combat, but was eventually overwhelmed. The king fled but was found hiding under a bridge over the River Browney, his reflection betrayed in the water. When the English soldier John de Coupland seized him, David knocked out two of Coupland's teeth. The king himself had been shot twice in the face with arrows during the fighting. Surgeons extracted one arrowhead but the tip of the second remained lodged in his skull, causing headaches for decades. More than 50 Scottish barons were killed or captured. Scotland lost its Constable, its Marischal, its Chamberlain, its Chancellor, and two earls. Modern historians estimate that 3,000 Scots died in the battle. The English lost fewer than a hundred.
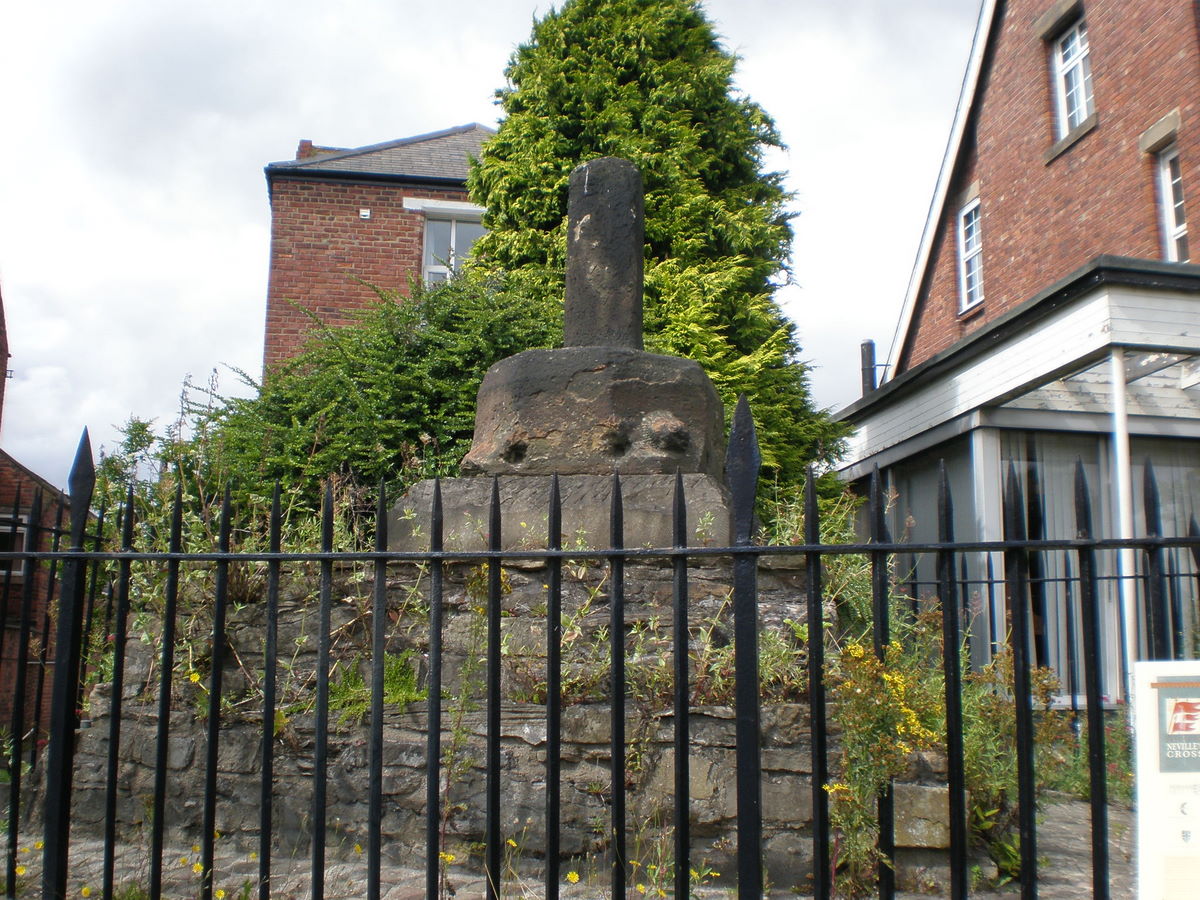
Forty Years of Peace
Edward III refused to ransom most of the Scottish prisoners, wanting to cripple Scotland's capacity for war by keeping its leaders imprisoned. David II spent eleven years in English captivity before being released for a ransom of 100,000 marks. The payment schedule imposed a truce that held for four decades, effectively ending the Second War of Scottish Independence. The Black Rood of Scotland, venerated as a piece of the True Cross and once belonging to Saint Margaret of Scotland, was taken from David and donated to the shrine of Saint Cuthbert in Durham Cathedral. Ralph Neville, who commanded the English forces, paid for a new stone cross on the ridge where the Scots made their stand. That commemorative cross was destroyed in 1589, and the Anglo-Saxon boundary marker it replaced has also vanished. But the battlefield is now registered by Historic England, and the ridge west of Durham still holds the memory of the day Philip VI's desperate gamble cost Scotland its king.
From the Air
Located at 54.77N, 1.59W, half a mile west of Durham city center. The battlefield ridge is on high ground overlooking Durham Cathedral, which serves as an unmistakable landmark. Nearest airport is EGNV (Teesside International), approximately 20 miles south. Newcastle Airport (EGNT) lies 15 miles north. The River Browney, where David II was captured, runs southwest of the site.