Operation Totem
On the morning of 15 October 1953, a flash brighter than the desert sun lit up the Great Victoria Desert. At Emu Field, a flat clay-and-sandstone expanse 480 kilometers northwest of Woomera, South Australia, Britain detonated its second atomic weapon -- a Blue Danube bomb mounted on a steel tower, 300 meters above the ground. The yield was 10 kilotons, slightly larger than expected. Twelve days later, a second device followed, producing 7 kilotons when planners had anticipated only 2 to 3. Together, these two blasts constituted Operation Totem, a test series whose purpose was technical and specific: to determine how much plutonium-240 could be tolerated in a weapon before it risked a fizzle.
The Plutonium Problem
Britain's first atomic bomb, tested in Operation Hurricane at the Montebello Islands in October 1952, used plutonium produced at the Windscale Piles. But Windscale could not produce enough material for the weapons program Britain envisioned, so eight new reactors were planned. These PIPPA reactors -- pressurized piles producing power and plutonium -- would generate both electricity and weapons-grade material, but at a cost: their plutonium contained a higher proportion of plutonium-240, an isotope prone to spontaneous fission. Too much Pu-240 meant a bomb might detonate prematurely, producing a reduced yield instead of a full explosion. Operation Totem was designed to find the threshold -- how contaminated the plutonium could be and still produce a reliable weapon. The answer would determine whether Britain's reactors could serve double duty, or whether weapons production would require dedicated facilities.
Emu Field
The site was chosen partly by elimination. The Royal Navy could not support another test at the Montebello Islands in time, so the search turned to the mainland near the Woomera Rocket Range. Len Beadell, the same surveyor who would later build the Anne Beadell Highway and other 'Bomb Roads' through the desert, scouted the area by helicopter and Land Rover. He and his companions may have been the first non-Aboriginal people to see this particular stretch of desert. The Dingo Claypan provided a natural airstrip. The drawbacks were obvious -- no all-weather road, extreme remoteness, and the presence of Aboriginal communities whose movements through the area were poorly understood by the authorities responsible for their safety. Despite these concerns, the site was approved. Winston Churchill personally sought permission from Australian Prime Minister Robert Menzies in December 1952, and construction began in early 1953.
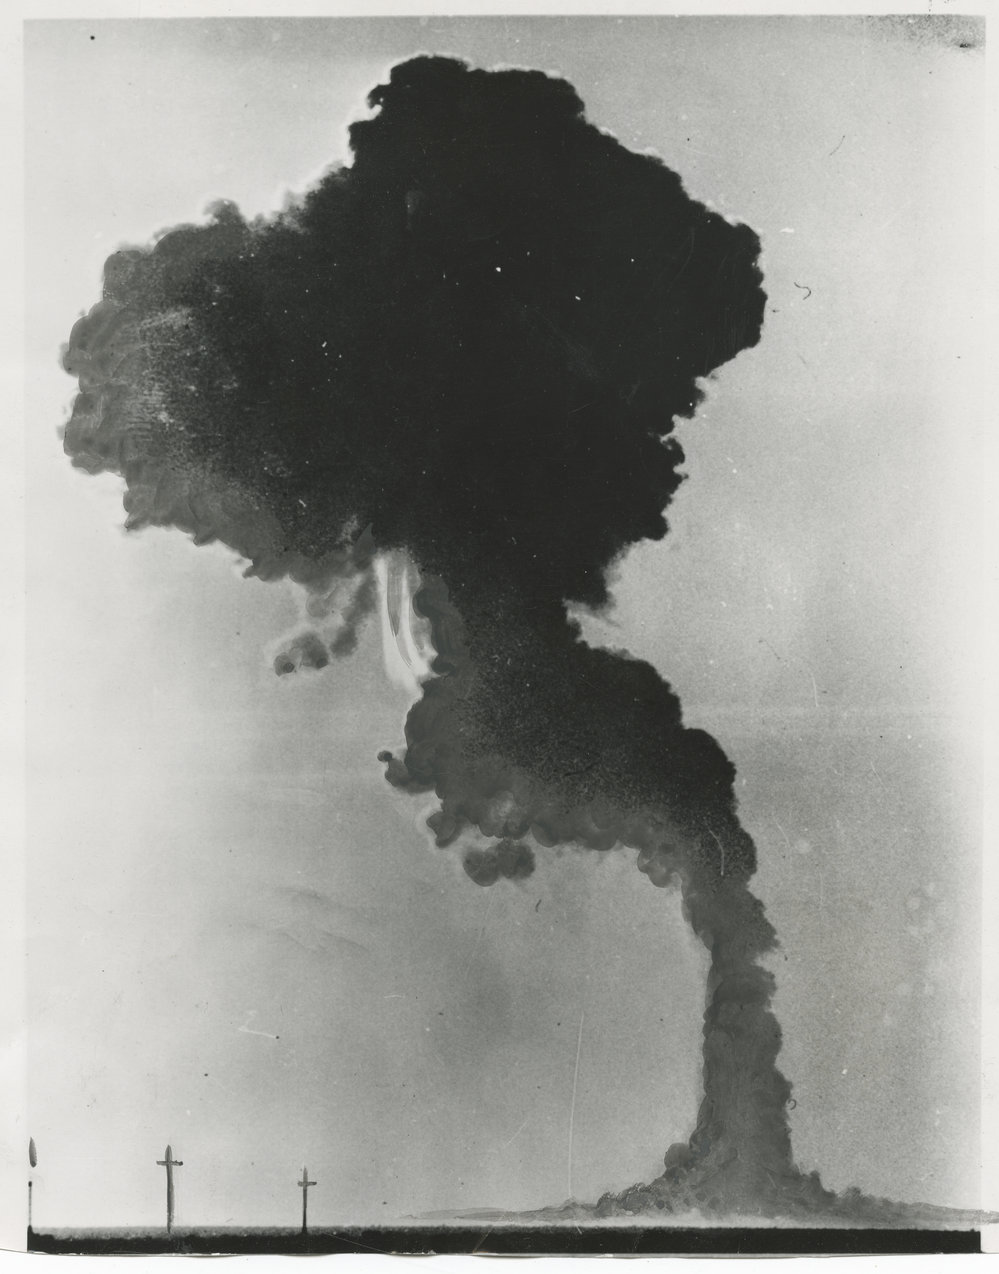
The Black Mist
The first detonation, Totem 1, produced a yield of approximately 10 kilotons -- larger than expected and close to the safety maximum. Fallout drifted further than predicted. A dark cloud, described by Aboriginal people as a 'black mist,' rolled across communities to the north and east. The Yankunytjatjara people at Wallatinna and other outstations reported illness, with symptoms consistent with radiation exposure: nausea, skin rashes, and eye problems. A native patrol officer, Walter MacDougall, had warned before the tests that Aboriginal families were living within the potential fallout zone, but his concerns were not adequately addressed. The contamination affected not only people but the land itself -- water sources, hunting grounds, and sacred sites that had sustained communities for thousands of years. The full extent of exposure was not acknowledged by the British or Australian governments for decades.
The Atomic Tank
Among the military equipment placed near the blast to measure effects was a Centurion tank, serial number 169041. Positioned close to the Totem 1 detonation, it survived with only light damage -- its engine was running during the blast, and the shockwave merely dented its exterior and sandblasted its paint. Repaired and returned to service, it earned the nickname 'The Atomic Tank' and went on to serve in the Vietnam War, where it survived a rocket-propelled grenade hit during a firefight in May 1969. The tank is now preserved at RAAF Base Edinburgh in South Australia, with the 1st Armoured Regiment. It holds the distinction of being the only tank known to have been subjected to a nuclear test and then returned to active combat service -- a peculiar artifact of an era when atomic weapons were treated as tools to be tested against conventional military hardware.
What Remains
The total cost of Operation Totem was 828,000 pounds, split between Britain and Australia. When the tests concluded, the Emu Field site was abandoned. Personnel flew out on RAAF aircraft. Penney returned to England. The site's remoteness, which had recommended it for secrecy, now made cleanup impractical. The results showed that PIPPA-produced plutonium with higher Pu-240 content could work in weapons, but the Emu Field experience also demonstrated that the site was unsuitable for sustained testing -- weather was unpredictable, logistics were nightmarish, and fallout could not be reliably controlled. This realization led to the establishment of the Maralinga test site, which hosted subsequent British nuclear trials from 1956 onward. For the Aboriginal communities affected by the fallout, acknowledgment and compensation came slowly, through royal commissions and inquiries that stretched into the 1980s and beyond. The desert has reclaimed Emu Field, but what happened there in October 1953 left marks that neither wind nor time have fully erased.
From the Air
Emu Field is located at approximately 28.63S, 132.20E in the Great Victoria Desert, about 480 km northwest of Woomera, South Australia. The site is extremely remote with no nearby airports. The nearest significant airfields are Woomera (YPWR) to the southeast and Coober Pedy (YCBP) further south. The flat desert terrain is visible from cruising altitude as an expanse of red-brown earth. Note: the Woomera Prohibited Area may restrict overflights -- check NOTAMs. The Dingo Claypan that served as the original airstrip may still be discernible from the air.