Siege of Tobruk
Lord Haw-Haw, the Nazi propagandist, meant it as an insult. Broadcasting from Berlin, he sneered that the defenders of Tobruk were caught like rats in a trap. The Australians holding the port adopted the name with defiant pride. For 231 days, from April to November 1941, these "Rats of Tobruk" clung to a crescent of Italian-built bunkers and barbed wire on the Libyan coast, denying Erwin Rommel the one thing his Afrika Korps needed most: a supply port within striking distance of Egypt.
A Port Worth Dying For
Geography made Tobruk indispensable. It was the only significant harbor between Benghazi, 900 kilometers to the west, and Alexandria in Egypt. For an army advancing east, Tobruk could receive 1,500 long tons of supplies per day -- enough to sustain an offensive into Egypt. Without it, every bullet, every tin of fuel, every replacement engine part had to travel more than 1,100 miles by road from Tripoli along the Via Balbia, a single coastal highway vulnerable to air attack and flooding. German engines overheated in the desert heat, tank engine life plummeted from 1,400 to 300 miles, and a third of supply trucks were perpetually broken down. An army that held Tobruk could wage war. An army that bypassed it was fighting on borrowed time.
The Perimeter Holds
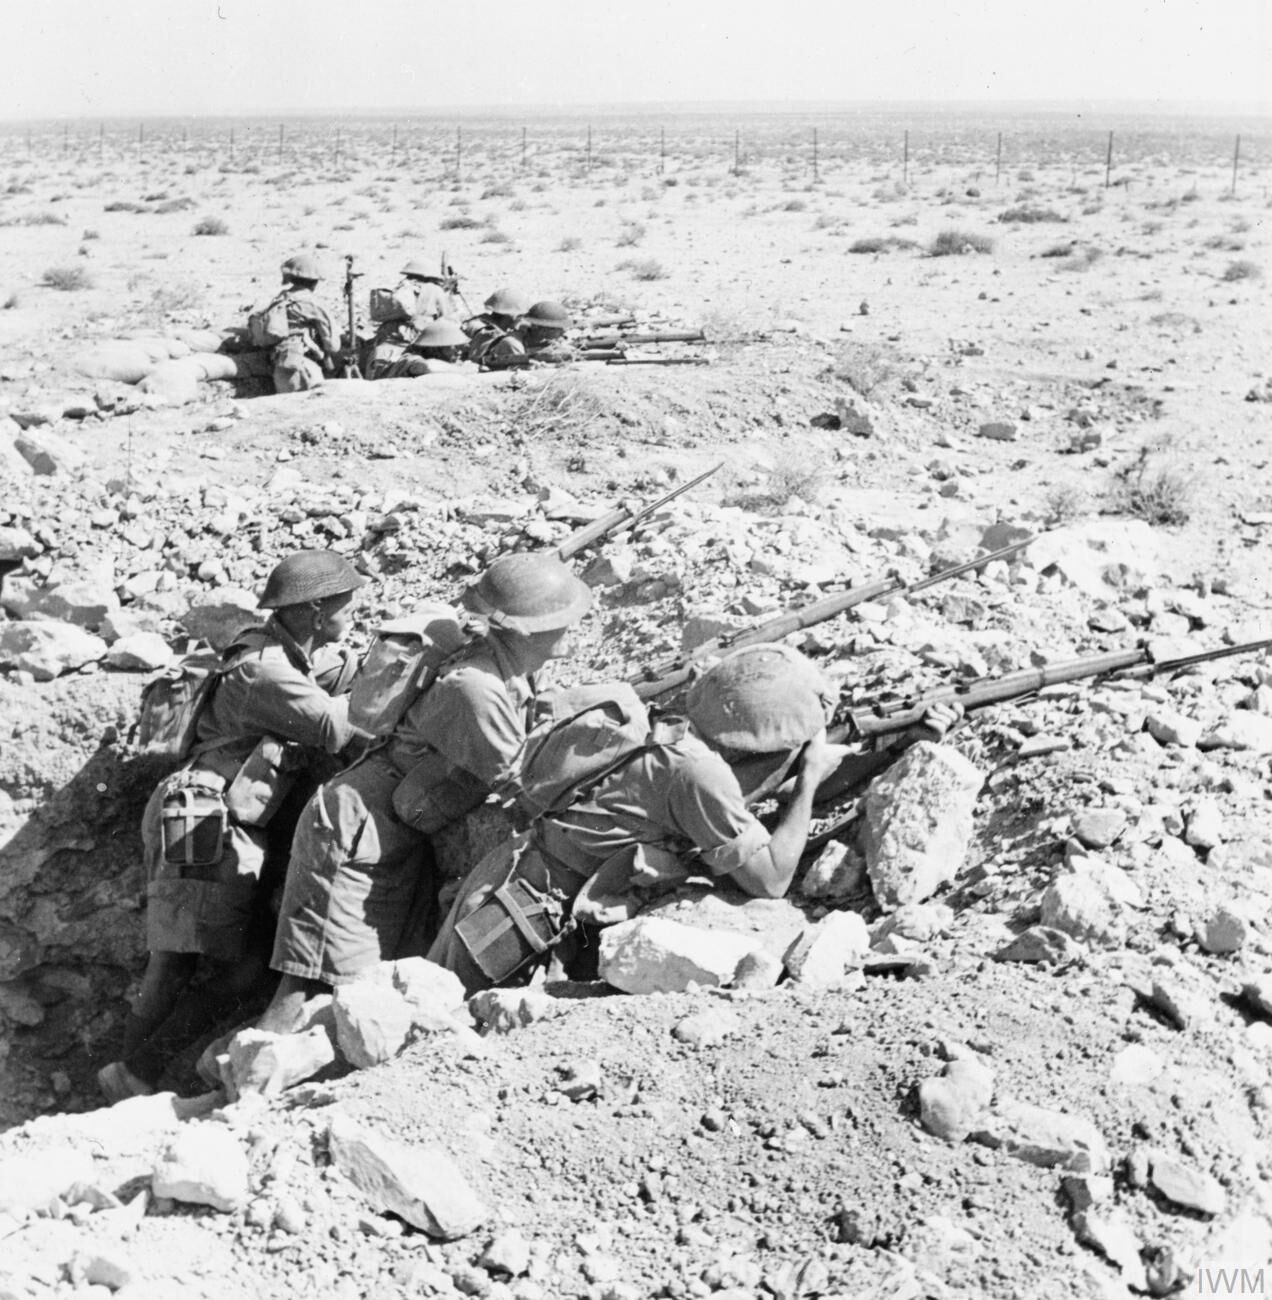
The Italian fortifications inherited by the defenders formed a semicircle about 30 miles long, positioned far enough from the harbor to keep artillery out of range. Concrete bunkers, an anti-tank ditch, barbed wire, and scattered minefields provided the skeleton; the Australians of the 9th Division, under Lieutenant-General Leslie Morshead, provided the muscle. Morshead understood that passivity meant death. With battalions stretched across five-mile frontages, a break-in was inevitable wherever the Axis made a serious effort. His response was aggression: nightly patrols, ambushes, raids, and reconnaissance that kept the attackers off balance and established Allied dominance over no man's land. When the 5th Light Division attacked along the El Adem road on 13 April, Australian infantry held their ground while anti-tank guns and the remaining British cruiser tanks caught the German armor in a crossfire. Sixteen Panzers were destroyed. The garrison lost two tanks and one field gun.
Siege and Survival
The air war above Tobruk was relentless and increasingly one-sided. Fliegerkorps X pounded the docks, anti-aircraft positions, and airfields with Stukas by day and medium bombers by night. By late April 1941, the RAF's 73 Squadron was reduced to five operational Hurricanes with exhausted pilots. The squadron was withdrawn, leaving the garrison dependent on anti-aircraft guns whose crews improvised desperately -- spreading fire across staggered altitude belts to force dive-bombers through longer gauntlets of shrapnel. At sea, the Tobruk Ferry Service ran a nightly gauntlet of its own. Royal Navy and Royal Australian Navy destroyers carried supplies in and wounded out, navigating through waters patrolled by Axis aircraft. The cost was savage: 26 ships sunk and 23 damaged over the course of the siege, including destroyers, sloops, and supply vessels. The ferry never stopped running. Through it all, the garrison held, repulsing a major assault at the Ras el Medauar salient in late April and early May where German and Italian forces broke through three miles of perimeter but could advance no further against minefields, anti-tank fire, and Australian counterattacks.
Relief and Replacement
Two attempts to break through from the outside failed before the third succeeded. Operation Brevity in May 1941 was a limited offensive that briefly captured Halfaya Pass before being pushed back. Operation Battleaxe in June was more ambitious and more costly -- the British lost 91 tanks in three days and General Wavell was sacked. Through the summer, the Australians endured, their health deteriorating in the dust and heat. In August, the Australian government and General Blamey demanded their withdrawal. The relief operation was conducted during moonless periods to avoid air attack: destroyers dashed in and out of the harbor in darkness, delivering the Polish Carpathian Brigade, the Czechoslovak 11th Infantry Battalion, and the British 70th Infantry Division while extracting the Australians in stages. By October, command had passed from Morshead to Major-General Ronald Scobie, and the fresh garrison settled in to wait for the offensive that would finally break the ring.
The Rats' Legacy
Operation Crusader, launched on 18 November 1941, succeeded where Brevity and Battleaxe had failed. The 70th Infantry Division broke out from Tobruk while the New Zealand Division fought westward, and on 27 November the two forces linked at Ed Duda ridge. The siege was over. Tobruk had held for 231 days -- the first time in the war that German Panzer formations had been stopped and held indefinitely. The cost was measured in thousands of casualties across Australian, British, Polish, Czechoslovak, and Indian units, and in the ships and aircraft lost keeping the port alive. Tobruk would fall the following June after the Battle of Gazala, but that was a different garrison and a different story. The Rats of Tobruk had proved something essential: that Rommel's army, for all its tactical brilliance, could be defied, contained, and ultimately outlasted.
From the Air
Located at 32.08°N, 23.96°E on the Libyan coast. Tobruk's natural harbor is clearly visible from the air, as is the semicircular arc of the defensive perimeter extending inland. The El Adem road runs south from the port. Nearest airport: Tobruk/El Adem (HLTQ). Best viewed at 5,000-10,000 ft to see the harbor, the defensive perimeter, and the desert approaches. The Ras el Medauar salient, scene of the heaviest fighting, lies on the southwest portion of the perimeter.