.jpg)
Battle of Blore Heath
Before the fighting began, Yorkist soldiers knelt on the heath and kissed the ground they stood on. They believed it would be the ground on which they died. Across about 300 metres of barren land, separated by a steep-sided brook running fast with September rain, Lord Audley had set up his Lancastrian army to spring a perfect ambush. The Yorkists, marching south-west through the Midlands toward Ludlow under Richard Neville, the Earl of Salisbury, had walked into the trap. They were outnumbered. They had no easy line of retreat. They drew their wagons into a defensive ring and arranged the troops behind them, and they prepared, as the chronicles put it, for the ground they would meet their deaths on. That was on 23 September 1459. By nightfall, Audley was dead and the Yorkists were marching south through a countryside scattered with fugitives.
Why an Empty Heath
The Wars of the Roses had been simmering since the First Battle of St Albans in 1455. Queen Margaret of Anjou, governing in the name of her unsteady husband Henry VI, had been quietly distributing a silver swan emblem to knights and squires loyal to the Lancastrian cause; the Duke of York and his allies had been building parallel networks of support across the country. By 1459 both sides were openly recruiting troops. The Earl of Salisbury, marching out from his fortress at Middleham in Yorkshire, needed to link up with York's main army at Ludlow Castle in Shropshire. Margaret ordered Lord Audley to intercept him. Audley chose Blore Heath: a thinly populated stretch of farmland east of Market Drayton, close to the modern village of Loggerheads in Staffordshire. The heath was wide, the brook was a natural moat, and Lancastrian numbers gave Audley every advantage.
The Trick at the Brook
Both commanders tried to parley before the killing began. When that failed, the battle opened in the formal medieval way, with an archery duel between English longbows. The two armies stood too far apart for the bows to settle anything, and the arrows fell short or did little damage. Salisbury then did the unexpected. Knowing that any direct assault across the brook would be suicidal, he pulled back part of his middle line, just far enough that the Lancastrians believed they were watching a retreat. The Lancastrians launched a cavalry charge to chase them down. As the horses committed to crossing the brook, Salisbury reversed his men and caught the riders strung out and exposed in the water. The order to charge may not even have come from Audley; whoever gave it had handed Salisbury the battle. The Lancastrian horsemen took heavy losses on the broken ground.
Audley Falls
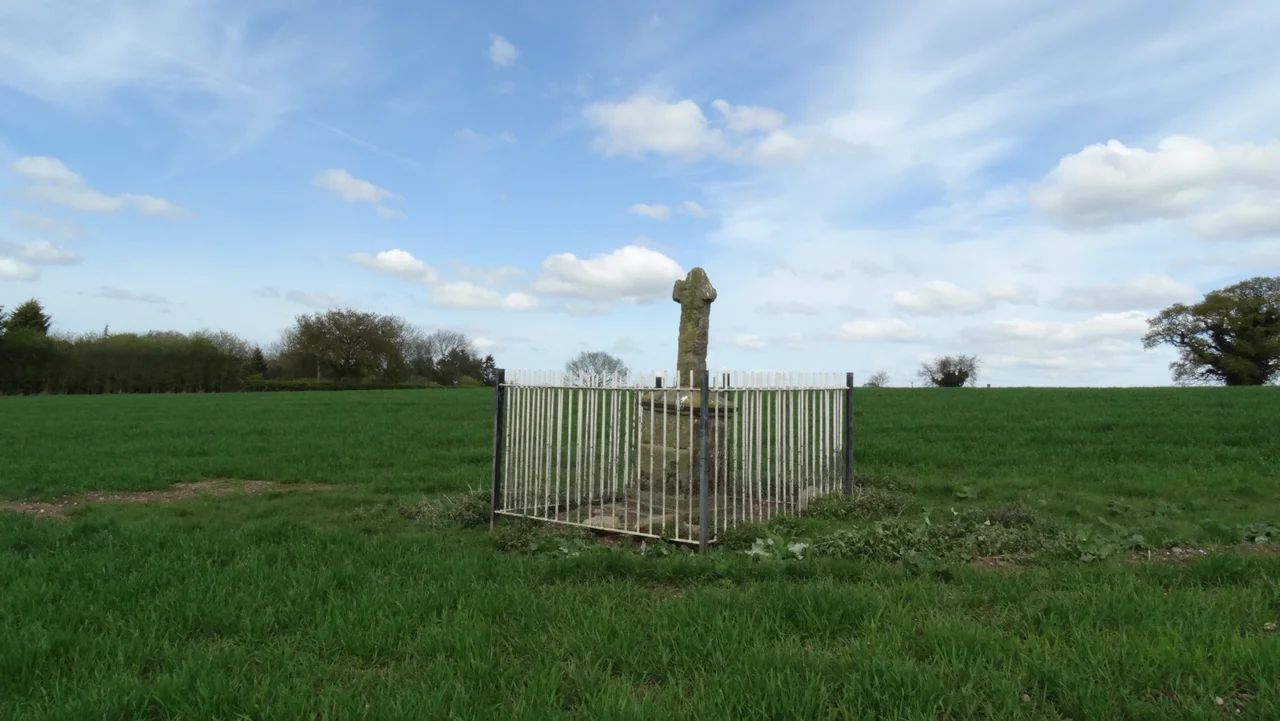
A second Lancastrian assault made it across the brook in greater numbers, and a long and bloody melee followed in which Lord Audley himself was killed. Command passed to his second, Lord Dudley, who ordered the remaining 4,000 men to attack on foot. That attack also failed, and at the critical moment about 500 Lancastrians changed sides, turning their weapons on their own army. The Lancastrian line collapsed. The Yorkists pursued the survivors through the night and across miles of countryside, killing as they rode. At least 2,000 Lancastrians died at Blore Heath or in the rout that followed; Yorkist losses were lighter but not trivial. Audley's body was carried east and buried at Darley Abbey in Derbyshire. Audley's Cross was raised on the heath where he fell, and rebuilt in stone in 1765 to mark the place more permanently.
The Friar with the Cannon
Salisbury could not stay on the field. He worried that fresh Lancastrian forces were close by, and he needed to press south to Ludlow. According to Gregory's Chronicle, he hired a local friar to remain on Blore Heath through the night and to fire a cannon at intervals, so that any Lancastrian reinforcements approaching in the dark would believe the battle was still being fought and would hesitate to advance. It worked. Salisbury made his camp on a hill outside Market Drayton that has since been called Salisbury Hill, and the Yorkist army reached Ludlow intact. The war had thirty years still to run, and Blore Heath was one of its earlier acts. The annual reenactment that ran here each September continued until 2010. The brook still cuts through the heath. The cross still marks where the queen's commander died trying to lay a trap that everybody on his side believed could not fail.
From the Air
52.91 N, 2.42 W, in farmland east of Market Drayton in Staffordshire, close to the Shropshire border and the village of Loggerheads. From 2,000 to 3,000 feet AGL the battlefield reads as gently rolling pasture cut by hedgerows, with the brook (the Hempmill Brook) visible as a darker line across the field. Audley's Cross sits in a small enclosure on the heath. Nearby airports: EGNT (no, that is Newcastle); use EGNX East Midlands to the east, EGCC Manchester to the north, EGBE Coventry to the south-east, RAF Shawbury (EGOS) to the south.
Nearby Stories
- National Memorial Arboretum 2.2 km away
- Stanlow Abbey 4.5 km away
- Alderley Edge 5.6 km away
- Lilleshall Abbey 7.2 km away
- Hope Cement Works 8.4 km away
- 2025 Wrexham National Eisteddfod 9.1 km away
- Tutbury Castle 16 km away
- Powis Castle 25 km away